Facing Sewer Damage: Why the Mechanics of CIPP Matter
Demystifying CIPP: What Actually Happens When We Line Your Sewer Pipe Without Digging is the first step to regaining your peace of mind when a major plumbing failure threatens your property. You already know your underground pipes are compromised, and you are likely picturing heavy machinery tearing up your driveway, uprooting your garden, and leaving a massive trench behind. That physical disruption is exactly what makes homeowners dread major plumbing repairs. The thought of a ruined yard often causes people to delay necessary fixes, which only allows the underground damage to worsen over time.
To learn more about how this works, explore our guide on trenchless technology.
Fortunately, modern solutions eliminate the need for destructive excavation. By understanding the physical footprint and the exact mechanics of the equipment used, you can approach repair day with confidence. The industry standard for this type of repair relies on specialized Cured-In-Place Pipe (CIPP) inversion equipment and epoxy resin. Rather than digging up the old, broken pipe, technicians use this technology to build a brand-new pipe directly inside the old one. This completely changes the homeowner experience from a messy, week-long construction project into a quiet, streamlined service visit.
What you can expect from the process:
- No heavy excavators: The repair is completed using specialized trucks and hoses rather than backhoes and trenchers.
- Preserved landscaping: Your lawn, hardscaping, and mature trees remain completely untouched.
- Faster turnaround: Most lining projects are completed in a single day, restoring your plumbing rapidly.
- Long-lasting results: The resulting epoxy pipe is highly durable and resists future damage.
When you know exactly how the materials behave and what the crew will be doing outside your home, the anxiety surrounding sewer repair vanishes. The following steps break down the exact sequence of events that take place when a professional crew restores your underground lines.
Step 1: Diagnosing and Prepping the Line Before Resin Meets Pipe
CIPP cannot happen blindly. Because the new liner relies on the existing pipe to act as a mold, that host pipe must be meticulously prepared before any lining materials are introduced. A successful installation requires intense preparation, especially in regions with specific environmental challenges. For example, Southern California’s dry climate drives aggressive tree root growth into aging sewer lines seeking moisture, making intense pre-cleaning a critical first step. Roots can completely choke a line, and if they are not removed, the new liner will cure in a distorted shape.
To ensure the host pipe is ready, technicians perform a detailed sewer camera inspection. This is not a simple DIY drain clearing; it is a highly specialized diagnostic process. The crew must verify that the pipe is completely clear of roots, scale, grease, and debris so the new liner can adhere properly to the host pipe walls.
The Role of High-Resolution Visual Diagnostics
Before any physical cleaning begins, technicians map the entire underground system using high-definition cameras. This step is non-negotiable for a professional CIPP installation.
- Mapping the damage: The camera identifies the exact location of cracks, bellied sections, and heavy root intrusions. This tells the crew exactly where the most intense cleaning is required.
- Taking precise measurements: Technicians measure the exact length and internal diameter of the pipe. The Cured-In-Place Pipe (CIPP) inversion equipment and epoxy resin must be customized to fit these exact dimensions to prevent wrinkling or structural failure.
- Aggressive hydro-jetting: Once the line is mapped, the crew uses highly pressurized water (often exceeding 3,000 PSI) equipped with specialized cutting nozzles. This strips away calcified scale and slices through thick tree roots, leaving the pipe walls smooth and bare.
- Final visual verification: A second camera run confirms that the pipe is completely bare. Any remaining debris could create a weak point in the final epoxy cure.
Step 2: Staging the Repair and the Minimal Equipment Footprint
One of the biggest concerns homeowners have is the physical presence of a plumbing crew on their property. It is entirely normal to worry about where trucks will park, how much noise will be generated, and what your yard will look like at the end of the day. The reality of a trenchless repair is far less intrusive than most people expect. The entire process is designed around a stress-free, minimally invasive nature that prioritizes staging equipment carefully to protect your property and landscaping from destructive digging.
Instead of a fleet of heavy earth-moving machines, the equipment footprint is remarkably compact. You will typically see a specialized box truck or trailer parked in your driveway or on the street. This vehicle houses the Cured-In-Place Pipe (CIPP) inversion equipment and epoxy resin, along with the climate-controlled environment needed to mix the materials. From this truck, technicians will run a series of flexible hoses directly to a single access point on your property—usually an existing cleanout in your yard or garage.
Because the crew only needs this single entry point, there are no long trenches cutting across your lawn. This minimal staging is a core reason why homeowners focus on protecting historic landscapes with trenchless repair. The visual and auditory disruption is kept to an absolute minimum.
Comparing the Physical Footprint
| Repair Aspect | Traditional Trenching | CIPP Lining Staging |
|---|---|---|
| Heavy Machinery | Backhoes, excavators, and dump trucks on the lawn. | One specialized box truck or trailer parked in the driveway. |
| Property Access | Requires tearing up the entire length of the pipe path. | Requires only a single 3-to-4-foot access point (cleanout). |
| Noise Levels | Loud diesel engines, scraping metal, and earth-moving noise. | Moderate hum from an air compressor and hydro-jetter. |
| Post-Repair Cleanup | Extensive soil backfilling, repaving, and replanting required. | Hoses are rolled up, and the yard looks exactly as it did before. |
Step 3: The Inversion Process Explained Simply
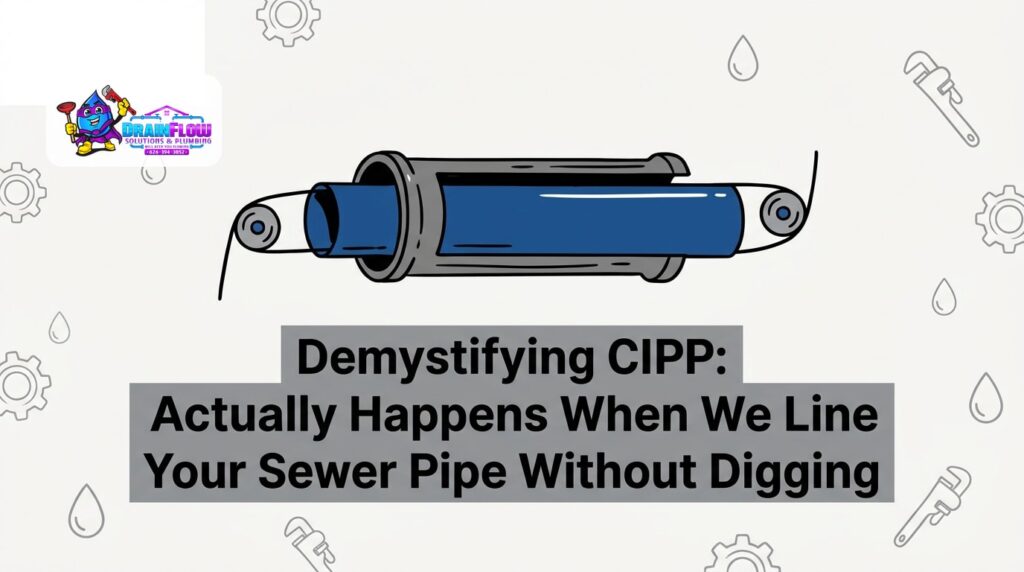
When technicians talk about “inverting” a pipe, the terminology can sound overly technical. However, the mechanics of pipe lining are actually quite straightforward once you understand the basic physics involved. Inversion simply means turning the flexible, resin-saturated liner inside out as it is pushed into the existing underground pipe.
Think of it like taking off a long sock by rolling it down from the top—the inside becomes the outside. The crew uses specialized Cured-In-Place Pipe (CIPP) inversion equipment and epoxy resin to perform this action under high pressure. As the flexible tube unrolls inside out through the host pipe, the epoxy-coated side is pressed firmly against the old, damaged pipe walls. This action forces the thick resin into every crack, joint, and gap, creating an incredibly tight seal.
Saturating the Liner (Wet-Out)
Before the liner can be inverted into the ground, it must go through a precise preparation phase known as the “wet-out” process. This happens inside the climate-controlled staging truck.
- The dry materials: The liner itself is a flexible tube made of heavy-duty felt or woven fiberglass. In its dry state, it looks like a thick, deflated fire hose.
- The epoxy injection: Technicians pour a carefully measured amount of two-part epoxy resin into the tube.
- The calibration roller: The tube is then passed through a mechanical roller (similar to an old-fashioned wringer). This squeezes the resin evenly throughout the entire length of the felt, ensuring there are no dry spots.
- Uniform thickness: This meticulous rolling process guarantees that the final pipe will have a completely uniform wall thickness, which is vital for structural integrity.
Once the liner is fully saturated, it is loaded into the inversion drum. Using either compressed air or water pressure, the drum shoots the liner through the underground pipe. The continuous pressure holds the new liner perfectly inflated against the old pipe walls, setting the stage for the final hardening phase.
Step 4: Hardening the Epoxy and the Curing Timeline
Once the liner is fully inverted and inflated inside the old pipe, it is still a soft, flexible material. The final step is to trigger the chemical reaction that hardens the epoxy into a rigid, structural pipe. This is where the resin curing timeline and temperature metrics become the most critical part of the entire operation. Depending on the specific type of resin and the environmental conditions, technicians will use ambient air, hot water, or pressurized steam to cure the liner.
The curing process generally takes between 2 to 4 hours. During this window, the pressure inside the pipe must remain absolutely constant. If the pressure drops, the liner could sag before it hardens. The chemical reaction generates its own heat (an exothermic reaction), which accelerates the hardening process. When the cure is complete, the result is a jointless pipe-within-a-pipe that meets stringent NASSCO (National Association of Sewer Service Companies) guidelines, boasting a structural lifespan of 50 years or more.
Monitoring Temperature Metrics for a Perfect Cure
A successful cure is not left to guesswork. Technicians actively monitor the process using advanced sensor technology.
- Thermal tracking: Sensors placed at the access points track the exact temperature of the resin as it cures.
- Achieving maximum strength: Consistent, elevated temperatures are required for the epoxy to reach its maximum structural integrity. If the ground is exceptionally cold, steam or hot water curing ensures the resin reaches the necessary thermal threshold.
- Final verification: Once the resin curing timeline and temperature metrics confirm the process is complete, the crew gradually releases the internal pressure. A final camera inspection is performed to verify that the new pipe is perfectly smooth, fully hardened, and ready for immediate use.

When Alternative Trenchless Methods Become Necessary
While CIPP is highly effective, it is important to understand that it requires a reasonably intact host pipe to act as a mold for the resin. If a sewer line has been neglected for too long, it may degrade past the point where lining is physically possible. When a pipe is completely collapsed, severely bellied (sagging deeply into the mud), or heavily offset at the joints, the Cured-In-Place Pipe (CIPP) inversion equipment and epoxy resin simply cannot pass through the obstruction.
In these severe cases, alternative trenchless options become necessary. The most common alternative is pipe bursting. Unlike lining, which builds a pipe inside the old one, bursting involves dragging a heavy steel bursting head through the damaged line. This physical force breaks the old pipe apart and pushes the fragments into the surrounding soil, while simultaneously pulling a brand-new, full-sized high-density polyethylene (HDPE) pipe into place behind it.
Both methods are highly effective and avoid the need for massive trenches. A professional diagnostic camera inspection is the only way to determine which methodology is required for your specific underground situation.
Frequently Asked Questions About the CIPP Lining Experience
How does CIPP lining work?
CIPP works by inserting a flexible, resin-saturated felt tube into a damaged sewer line using air or water pressure. Once the tube is fully inverted and pressed against the old pipe walls, the epoxy resin is cured using heat. This creates a solid, jointless new pipe directly inside the old one, sealing cracks and preventing root intrusion.
How long does CIPP take to cure?
The standard resin curing timeline and temperature metrics dictate that most residential liners take between 2 to 4 hours to fully harden. The exact time depends on the diameter of the pipe, the ambient ground temperature, and whether the crew uses hot water, steam, or ambient air to accelerate the chemical reaction.
Can tree roots penetrate CIPP?
No, tree roots cannot easily penetrate a properly installed CIPP liner. Because the new epoxy pipe is completely jointless and seamless from end to end, there are no weak points or microscopic gaps for roots to exploit. The hardened epoxy is highly dense and resists the moisture-seeking behavior of tree roots.
What does epoxy pipe lining smell like during the curing process?
During the wet-out and curing phases, you may notice a distinct, chemical odor similar to strong fiberglass resin or model airplane glue. This smell comes from the styrene or epoxy compounds reacting. The odor is temporary, dissipates quickly once the cure is complete, and is safely vented outside away from your living spaces.
Will CIPP significantly reduce the diameter of my sewer line?
While CIPP does add a new layer inside your existing pipe, the reduction in diameter is minimal—typically only a fraction of an inch. Because the new epoxy interior is incredibly smooth, it actually reduces friction and often improves the overall flow rate of the sewer line, even with the slightly smaller diameter.
Moving Forward with a Clear Timeline and a Protected Yard
Understanding the exact mechanics behind trenchless technology reveals why it is the preferred choice for modern homeowners. From the initial high-pressure hydro-jetting to the precise resin curing timeline and temperature metrics, every step is calculated to restore your plumbing without destroying your property. The physical footprint remains small, the noise is manageable, and your landscaping stays intact. If you are dealing with chronic sewer backups or severe root intrusions, exploring professional trenchless options allows you to resolve the problem permanently without the stress and mess of traditional excavation.